
Capturing the Magic: A Deep Dive into Nighttime Portraits
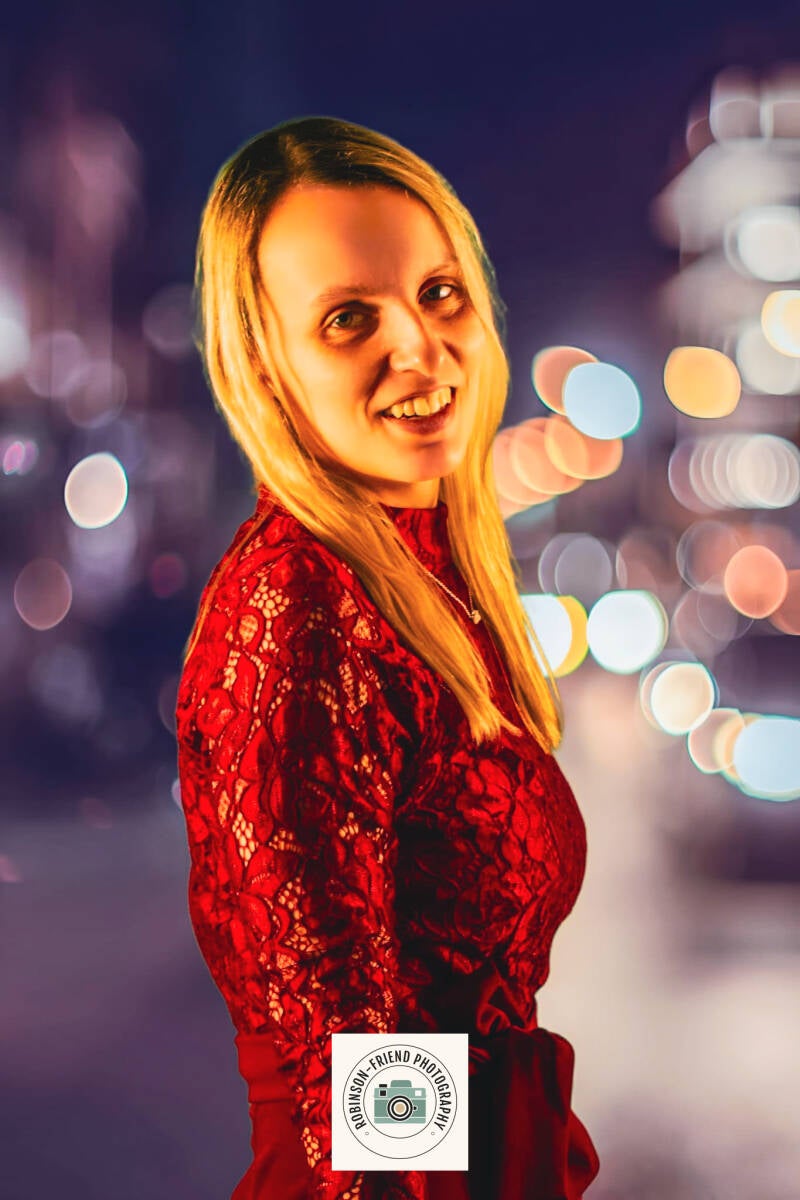
Have you ever wondered how photographers create those stunning portraits with dreamy, blurred lights in the background? It's all thanks to a technique called bokeh. This photo is a great example, so let's break down how a shot like this is created, from the camera settings to the editing process.
The Photo Shoot: Getting the "Bokeh" Effect
"Bokeh" is a Japanese word that refers to the aesthetic quality of the blur in the out-of-focus parts of a photo. To get that beautiful, soft blur, a photographer needs to carefully control three main things:
- A Wide Aperture: The key to this look is using a wide aperture (a low f-stop number, like f/1.8 or f/2.8). This setting lets in a lot of light and, most importantly, creates a very shallow depth of field. This means the subject (the person) is in sharp focus while the background falls quickly out of focus.
- The Right Distance: The photographer made sure there was plenty of space between the person and the background lights. The further the background lights are from the subject, the more blurred and orb-like they will appear.
- Lights, Lights, Lights: A nighttime cityscape is the perfect backdrop for this effect. The distant streetlights, headlights, and building lights become those wonderful, circular orbs of light when out of focus.
To get the right exposure in a dark environment, the photographer likely used a combination of a low ISO (to avoid graininess) and a slightly slower shutter speed to properly expose the scene. They may have also used a flash or a continuous light source to illuminate the subject and make them stand out against the dark background.
Post-Processing: Bringing the Image to Life
Once the photo is taken, editing plays a crucial role in perfecting the final look. Here's what was likely done:
- Color and Tone Adjustments: The vibrant, warm colors in the image suggest that the photographer enhanced the saturation and tweaked the color temperature. The dark areas were likely brightened, and the overall contrast was adjusted to make the subject pop.
- Sharpening and Noise Reduction: A common challenge in low-light photography is noise (graininess). The photographer likely used editing software to reduce the noise while carefully sharpening the subject's features, like her eyes and hair, to ensure she is the clear focal point.
- Final Touches: The final editing steps would have involved cropping the image and adding any stylistic filters or adjustments to achieve the desired mood. The watermark on the bottom confirms the professional touch, as photographers often add their logo to protect their work.
By combining the right in-camera techniques with skilled post-processing, photographers can transform a simple night shot into a magical, eye-catching portrait.
Add comment
Comments